
Photolemur
Photos as you imagined them
Luminar Neo empowers you to express the beauty you see
Feature-packed editor with an intuitive interface
This convenient editor contains a simple, innovative, and user-centered interface. It removes all the complex sliders that can confuse you and places all the emphasis on your photos. However, despite its simplicity, it still capable of providing the most advanced image processing technology. With its 12 smart technologies, you’ll be able to make your images better, even without spending hours editing your photos.
Photolemur 3 is a fully automatic, drag-and-drop, AI-powered photo editing application. Released by Skylum in 2018, it was available for Windows and macOS as a one-time, subscription-free purchase
Everything from the face, objects, colors, horizons, and the sky will be automatically analyzed and adjusted for you. Unlike other editor tools that only apply a default filter to enhance your photos, Photolemur serves a special technology that is capable of distinguishing even the smallest detail and element in your photo. Thus, you don’t have to switch from this filter another filter just to know the most suitable effect to your image.
What’s more impressive about the app is its capability to enhance images in bulk. It can also do this automatically. You only need to drag and drop all of your photos, and the work will be done in one click. However, this is only available for the paid version of the program, and the exported outputs in your demo version will contain a watermark.
Made for your convenience
Photolemur is indeed designed with ease of use for users, of course, without sacrificing the array of excellent tools it provides. Thanks to the special technology that the program utilizes, almost everything about editing in this app is possible to be done immediately. Thus, you can spend more of your leisure time in other valuable things. It is both available in the freemium and paid version.
How It Works
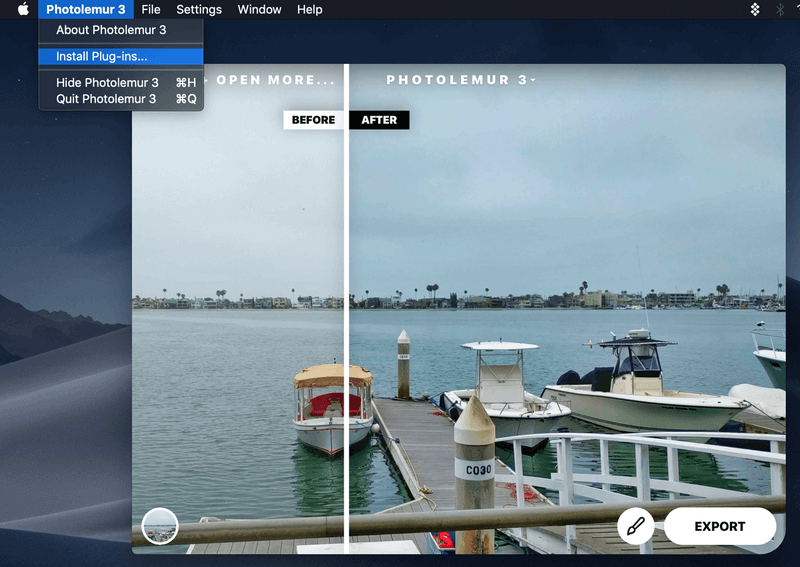
Photolemur is packed with features, so let’s break down exactly what the program offers. Once you install the program (either by official download or through Setapp) and launch it for the first time you will see this screen:
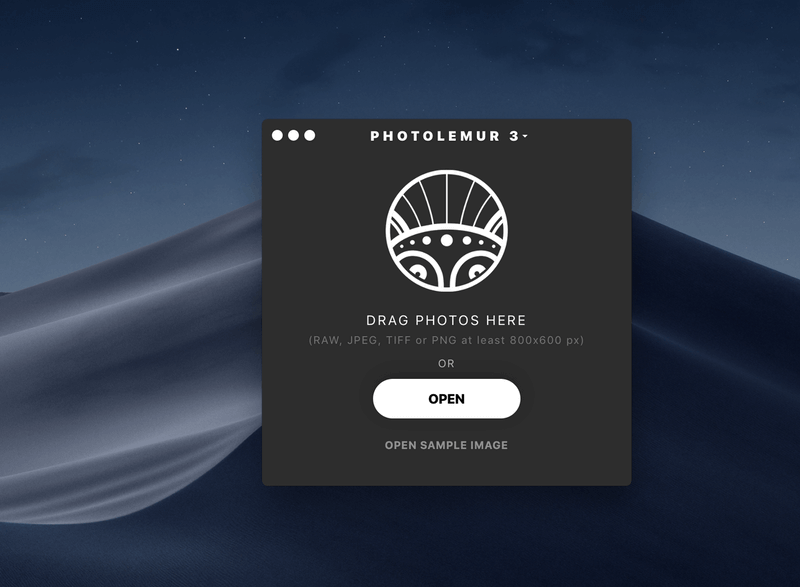
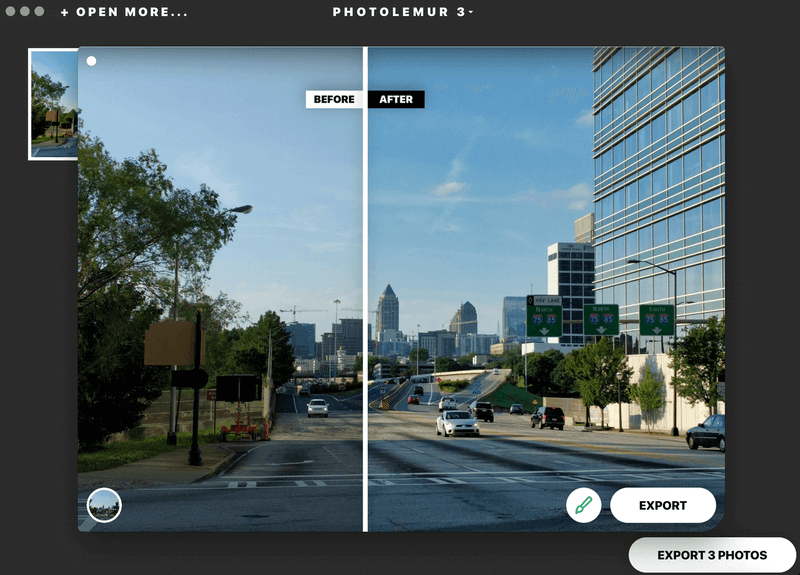
It’s designed to be simple to use right from the start, and the uploader is no exception. Once you’ve dropped in an image, you’ll see a brief loading screen while Photolemur creates the initial edit.
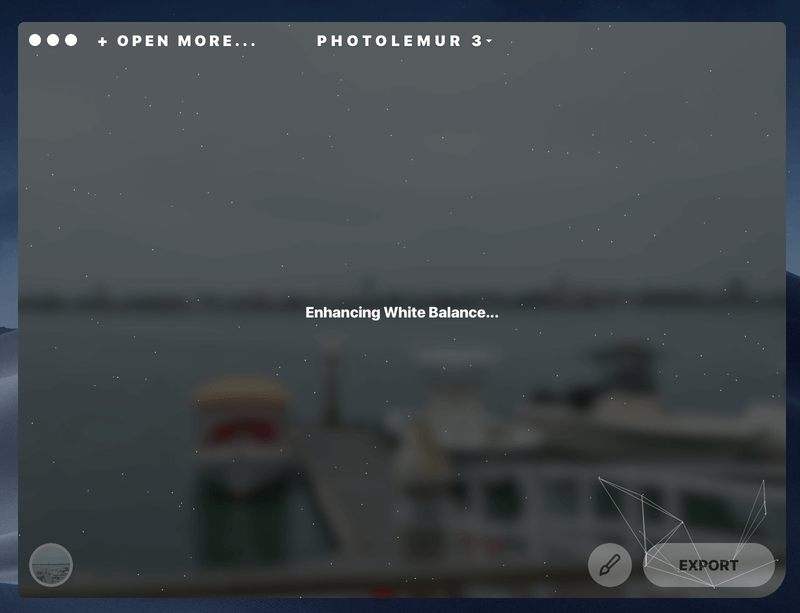
This seems to take about 1 to 5 seconds per image. Once this is done, you’ll see the default edit of your image. In this case, I’ve uploaded an image of mine taken at a marina I visited. The original is a bit dull, but Photolemur has created an enhanced version with more vibrant colors.
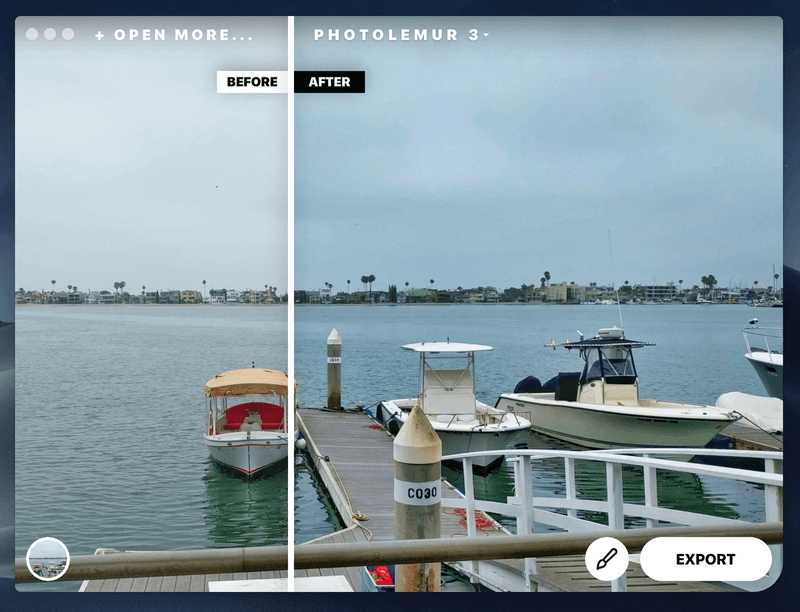
The white line in the middle can be dragged across the image so you can see changes in different sections, or pulled all the way to one side in order to see the complete image.
You can change the strength of the edits on your image, although you can’t change much about the edit specifics. To do this, click the paintbrush icon in the bottom-right corner.

Then, move the green dot to the left to see less of an effect on your image or to the right for a stronger effect. The small smiling face icon refers to the setting for Face Enhancement. If you click this icon, Photolemur will search for faces in your image and attempt to enhance any it finds. This will also activate a second setting, “Eye Enlargement”.

This is the full extent of adjustments available for altering the edits to your image.
Styles
At the bottom-left corner of every image, you’ll notice a small circle icon. Click this once to bring up the styles menu.

By default, there are 7 styles: “No Style”, “Apollo”, “Fall”, “Noble”, “Spirited”, “Mono”, and “Evolve”. These style buttons function essentially as filters. If you press one, Photolemur will take 1 to 5 seconds to load a new version of your image with the new style applied.
For example, here I applied the “Evolve” style to my image:
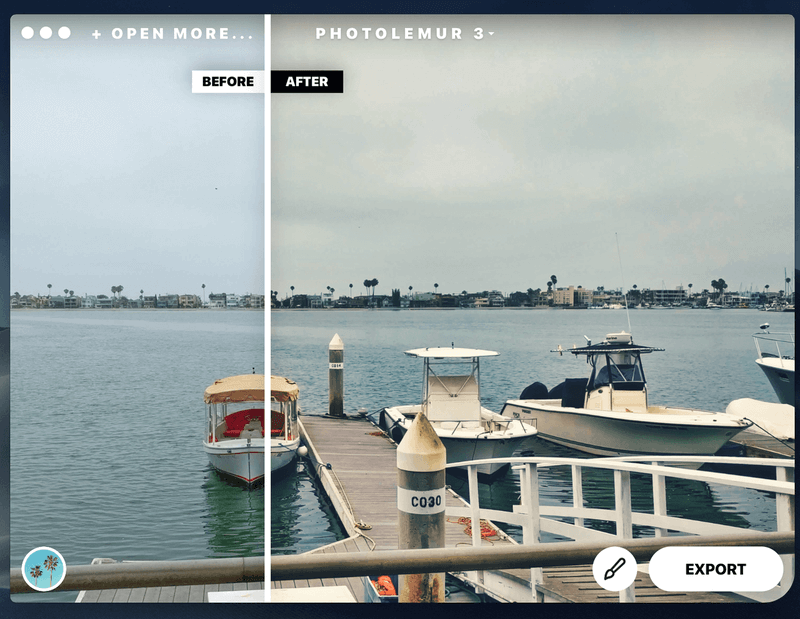
This gave it a much more retro or aged look than the original image.
You may notice that the style bar has a small “+” icon on the right side. This is the “Get New Style” button. It can be used to install additional styles from the web… at least in theory. At the time of writing, this button actually redirects you to the following web page:
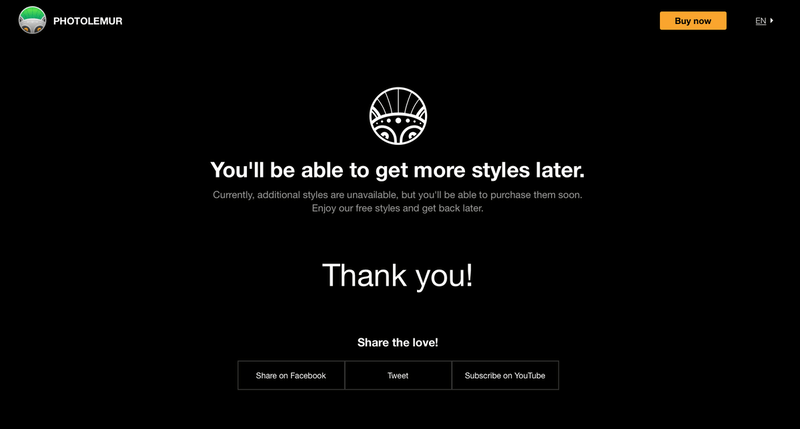
However, I do think it is important to note that this page says you will be able to purchase additional styles. I reached out to Photolemur about this to get a little bit more info.
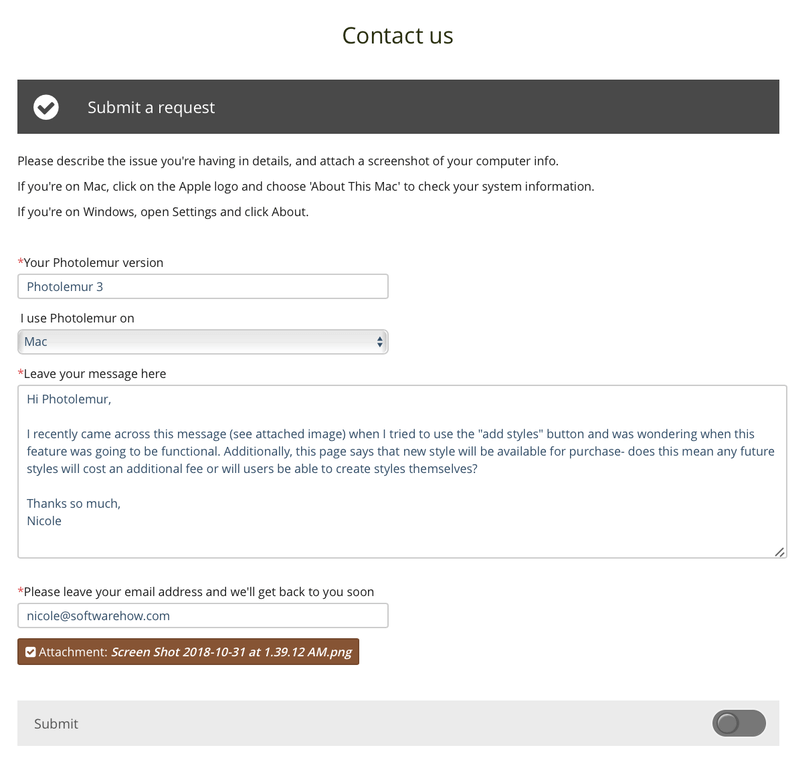
Photolemur sent me the following reply:
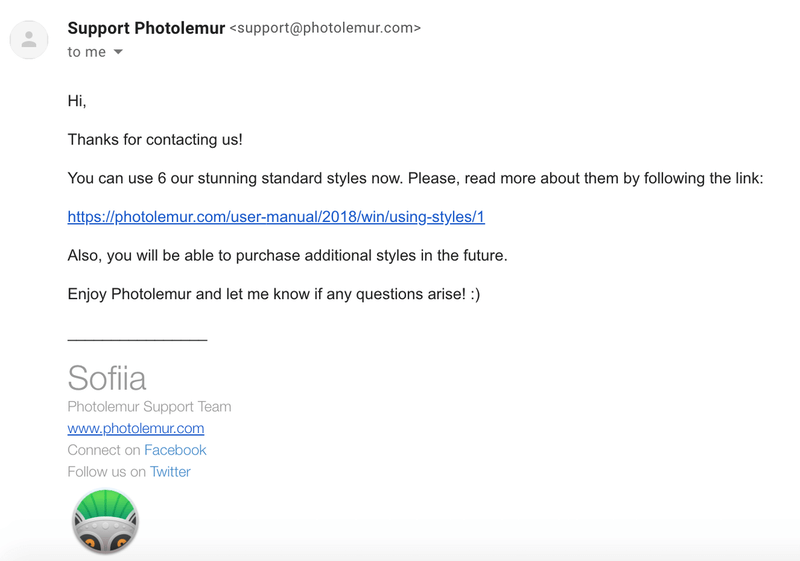
Unfortunately, I found this answer less than enlightening. After all, I had asked them when the style would be available and if they would all be paid — I already knew that it was even in the works and had attached a screenshot showing as much. Their email didn’t really say anything new, so it looks like users will be in the dark on this one until it’s actually released.
Batch Uploads
When opening Photolemur, you have the option to choose multiple images at once instead of just a single shot. Just press SHIFT+ Left Click, and then choose “Open”.
 Here, I’ve selected three images of mine. At first, when these images are uploaded, they look the same as the original file. However, after a few seconds, they were transformed into much more vibrant images.
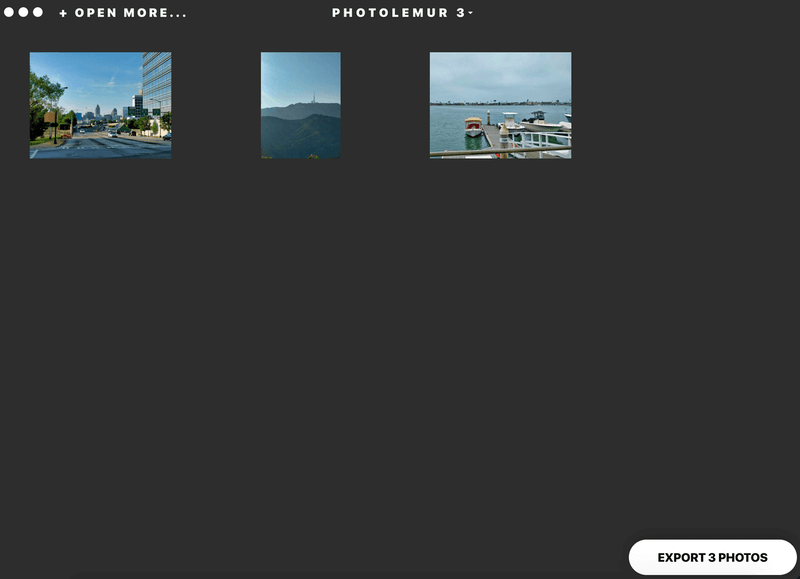
Clicking on any particular image will bring up the editor in a sub-window where you can make adjustments to just that shot.
You cannot make edits en masse to all the photos you have uploaded.
The batch uploader seems to work effectively. It quickly edits your shots and applies the default “No Style” effect to all your images. It also makes it easy to immediately export your altered images.
However, if you want to make adjustments to photos individually, or even as a group, you’re going to find it tedious to manually adjust each photo from the batch. The batch upload is best used when you’re satisfied with what the default settings are able to achieve with your images.
Export
When you’re done editing and ready to send your picture back out of the program, there are several options.
If you’re exporting multiple images at once, your only options are saving to the disk or emailing. However, if you export a single image you can also link to a SmugMug account.
If you select “Disk,” you’ll see a small window pop up where you can rename the file and choose the type you would like to save as. You can choose JEPG, PNG, TIFF, JPEG-2000, Photoshop (PSD), and PDF.
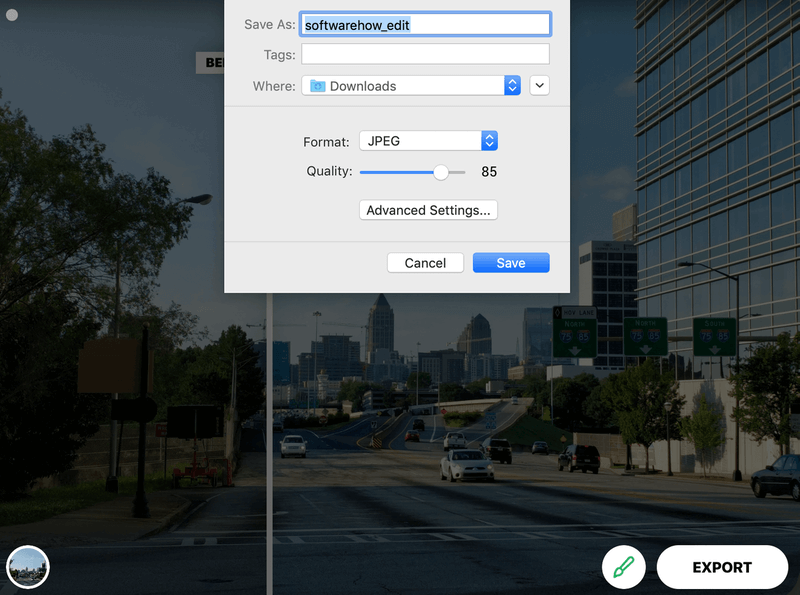
Beneath each type, you’ll also see a small button that says “Advanced Settings”. If you click this, you’ll be redirected to a more in-depth export screen.
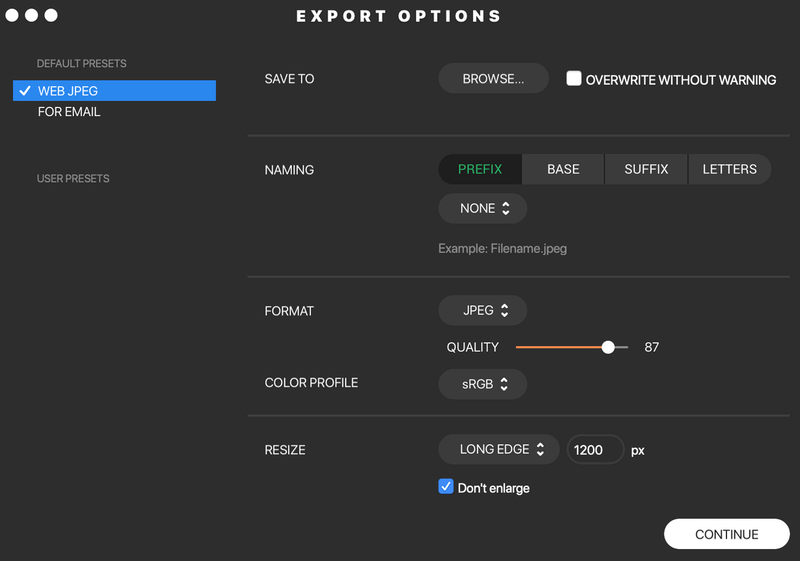
Here, you can alter the color settings and other special file features that are normally set to defaults.
If you choose “Email” to export your image, you’ll see the following screen:
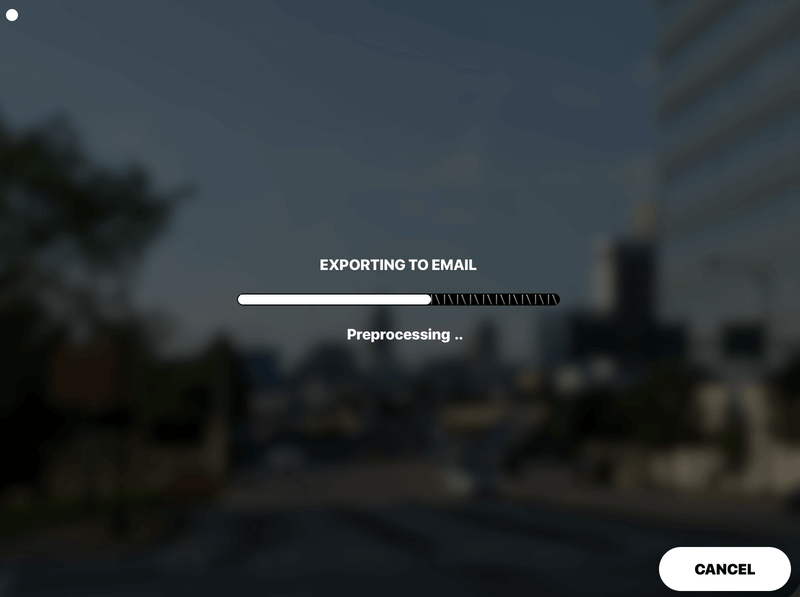
Once the export is complete, Photolemur will auto-launch your default email client and attach the finished photo to an email draft.
Plugin
Like many photo editing programs, Photolemur includes the ability to function as a plugin for a more robust option such as Adobe Photoshop rather than work as a standalone app.
In order to install Photolemur as a plugin, you’ll need to Adobe CS5 or higher. After that, open Photolemur. On the app menu, go to Photolemur 3 > Install Plug-ins.
Once you do this, you’ll be prompted to link Photolemur with your Adobe application of choice, as seen here:
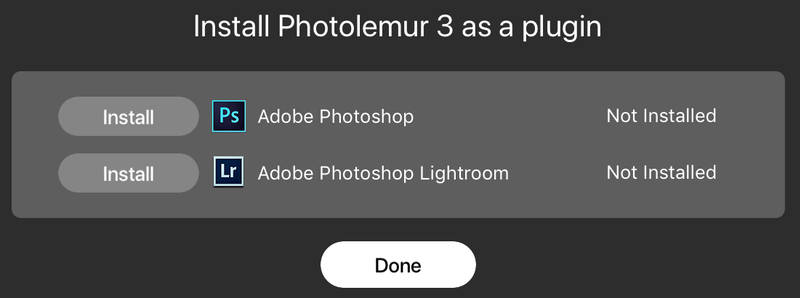
Once installed, it should be available just like any other plugins you may have installed on Photoshop or Lightroom.
PROS
- Fast and simple image processing
- Batch processing unlimited images
- Extensive image format support, including RAW
- Well-balanced results with correct exposure and white balance
- Face enhancements
CONS
The photo editor you always dreamed of
Explore
1 license
Luminar Neo
Learn more
-
License for 1 computer
-
5% Marketplace discount
-
Access to performance and stability updates, plus any other free platform updates
- Access to all major platform upgrades
₹799/mo
Billed monthly (Total ₹9588 /year )
Best Deal
Pro
2 licenses
Luminar Neo
Learn more

All extensions
Learn more
-
2 licenses for 2 computers
-
10% Marketplace discount
-
Access to performance and stability updates, plus any other free platform updates
- Access to all major platform upgrades
- Immediate access to all Extensions, including those released throughout your subscription period
₹749/mo
₹1189
Billed ₹8999 annually SAVE₹5269
Lifetime
1 license
Luminar Neo
Learn more
- Add pro-level tools:

2022 Extensions pack
Learn more
₹23999
₹27999
-
License for 1 computer
-
Access to performance and stability updates, plus any other free platform updates
- 2022 Extensions pack available for purchase
₹11999
₹15999
One-time